

How To Install Ampps On Windows
There are plenty of ways to install WordPress on your local auto. I use a complimentary software package called AMPPS.
It'due south like to packages like MAMP and XAMPP in that in includes all of the things y'all need to run WordPress: PHP (the programming language), MySQL (the database), and Apache (the spider web server). That's what some of the Every bit, the Ps, and the Ms stand for in these acronyms.
While I utilize a Mac, annotation that AMPPS is also supported on Windows and Linux. Instructions may differ slightly for not-Mac users, only the core concepts are the same.
Step 1: Download and Install AMPPS
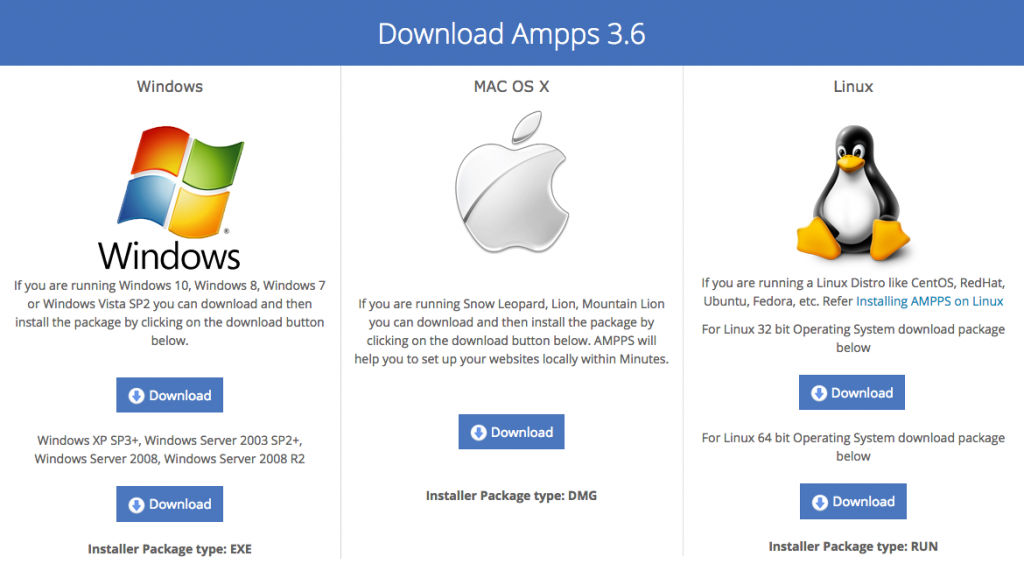
For our purposes, we'll avoid the "PHP Dev Bundle" and download the latest version of AMPPS.
The latest version (at the fourth dimension this tutorial was last updated) is 3.6. The download is a few hundred megabytes, then it may take a while on a slower connexion.
Select the advisable download depending on your operating system. If you're a Linux user, you'll demand to select between the 32bit or 64bit packages.
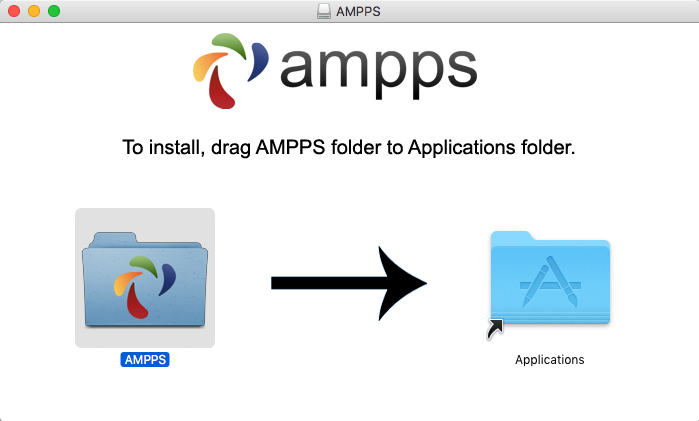
Install it like yous would whatever other application. Since I use a Mac, after downloading, I'll mount the DMG file and drag the app into my Applications directory.
Footstep 2: Start Apache and MySQL
After installing, open up the app. Yous'll be greeted with the "Command Middle."
Showtime both Apache and MySQL by clicking the green buttons under each cavalcade.
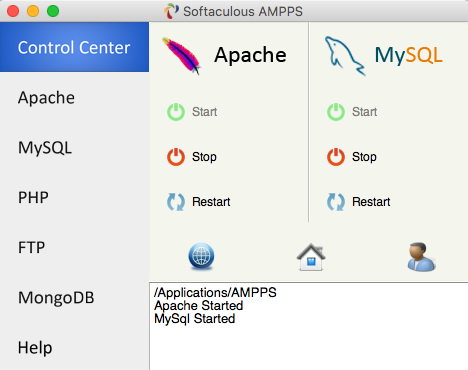
You lot'll see success messages in the condition window below, but to make double sure it's working, blazon http://localhost/ into your browser'south address bar.
In some browsers, yous may be able to go away with just typing "localhost" merely since many browsers combine their address bar with a search engine, information technology might get confused and try to search for "localhost" instead. And so prefixing "localhost" with http:// is a good habit to go into.
At this betoken, y'all accept a functional web server running locally on your calculator.
Fun fact: http://127.0.0.1 will also work similar http://localhost/ and can be used interchangeably. This is known as the loopback IP address.
Step three: Choose a false domain
If we really wanted to, nosotros could employ a URL like http://localhost/wordpress/ for our locally hosted WordPress site, but we'll go ahead and install WordPress on a more realistic-looking domain.
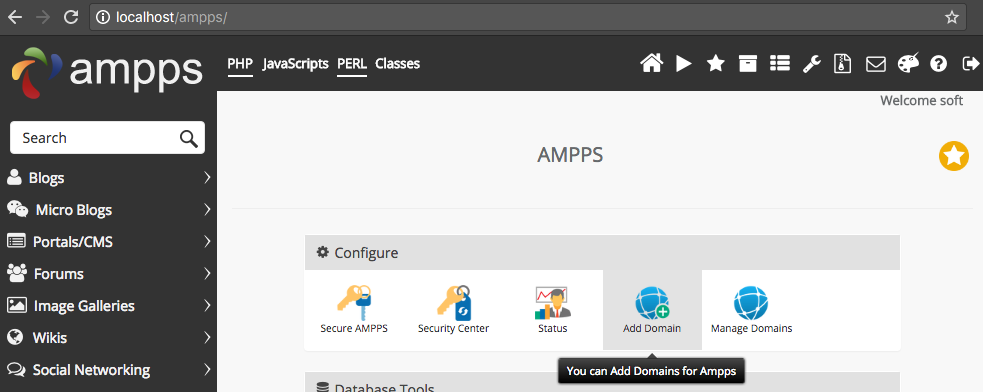
To get started, click the business firm icon in the AMPPS Control Centre to access AMPPS Home.

Y'all can likewise access AMPPS Domicile by typing the following URL into your browser's address bar: http://localhost/ampps
If you can't access it, refer back to pace 2 and make sure Apache and MySQL are running.
Once on the AMPPS dwelling house screen, click on the "Add Domain" link.
Reserved domain extensions for testing
At that place are iv reserved domain extensions for "testing and documentation examples" according to this.
- .exam
- .example
- .invalid
- .localhost
To avert conflicts with potentially real domains (like .dev, which is a popular i for local evolution) you lot should utilize 1 of the above.
For example purposes, we'll use the post-obit fake domain: wordpress.localhost
Pace 4: Add the fake domain
On the "Add together Domains" screen (which can likewise exist accessed by typing http://localhost/ampps/alphabetize.php?act=ampps_domainadd in your address bar, but it'due south nice to know other means of getting there) we'll blazon in our desired domain.
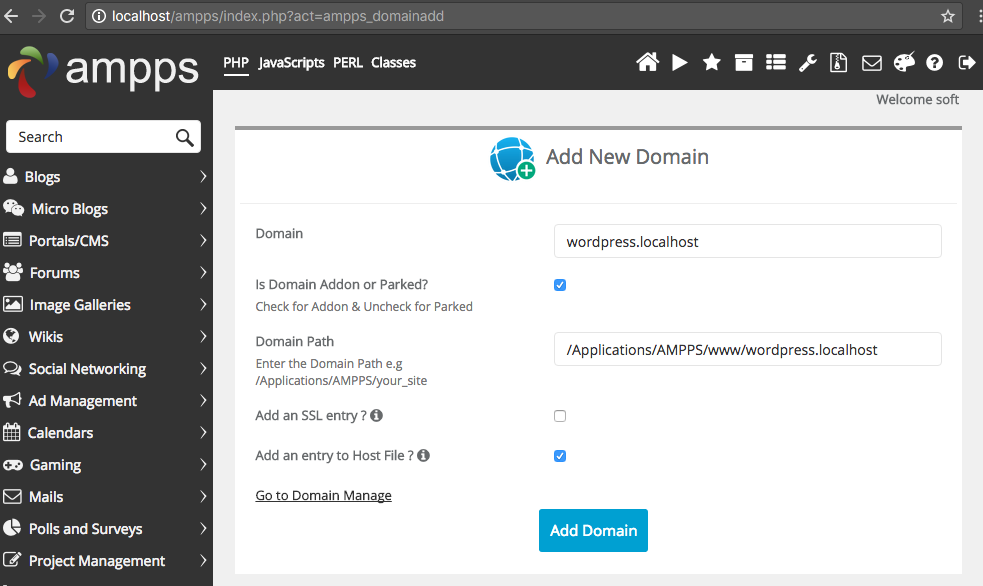
You'll discover as you're typing, the "Domain Path" field fills out to match. This is the folder where we'll subsequently add our WordPress files, so have note of this path. On a Mac, it will be the post-obit: /Applications/AMPPS/world wide web/wordpress.localhost
Continue all the other settings on their defaults, every bit seen in the screenshot:
- Is Domain Addon or Parked? Checked
- Add an SSL entry? Unchecked
- Add an entry to Host File? Checked
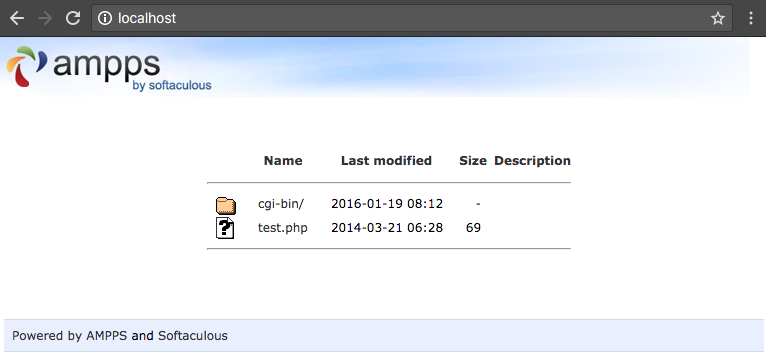
Then click "Add Domain" to add the domain. At this point, typing http://wordpress.localhost/ into your browser will atomic number 82 to a page with an empty directory index (except for a /cgi-bin/ directory, which y'all won't need).
![]()
Even though simply "wordpress.localhost" may all be that's necessary, prefixing the domain with http:// is a good practice and then browsers don't get confused and endeavour to run it through a search engine starting time.
Step 5: Download WordPress and unzip in your directory path
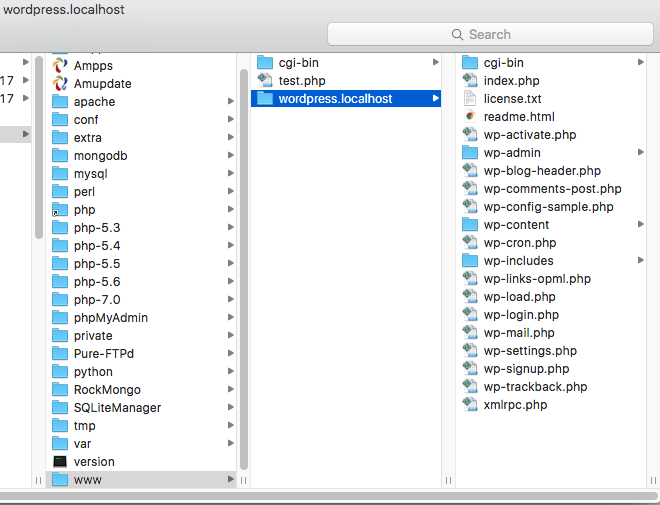
Take hold of the latest WordPress core files from WordPress.org, and extract them in the directory path we chose above.
As a reminder, that path is: /Applications/AMPPS/www/wordpress.localhost
A quick way to find information technology on a Mac is to blazon your chosen domain into Spotlight search, and select the first upshot.

Afterwards extracting the files, our directory structure should await like this:
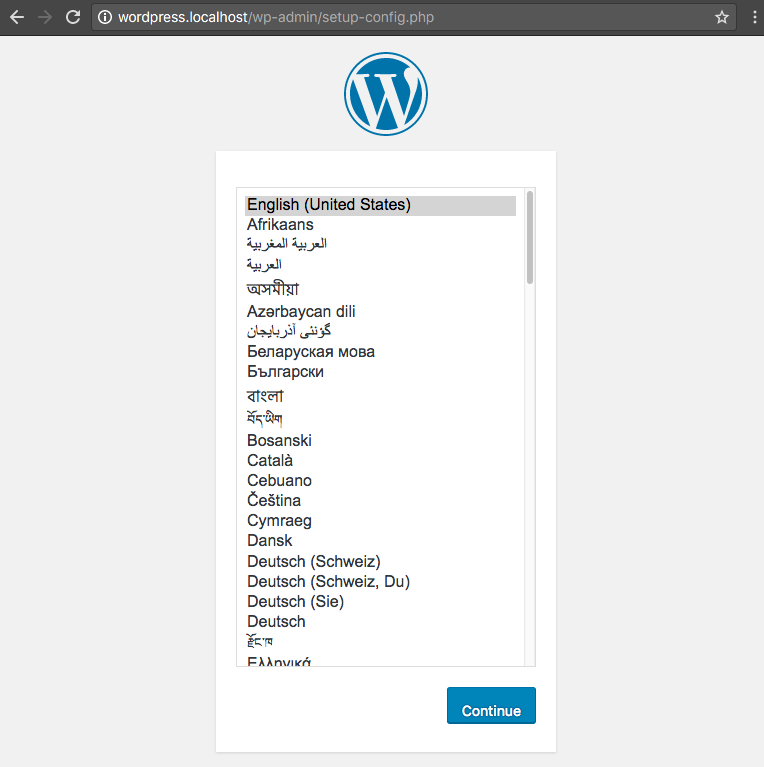
Also after extracting the files, we'll be greeted with the WordPress installation screen by typing our domain into our browser'south address bar.
But before we go through the installation procedure, we demand to set upwardly the database.
Step six: Ready a database in phpMyAdmin
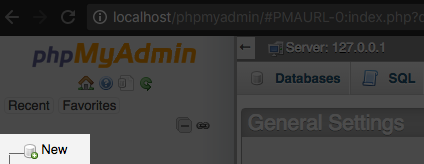
AMPPS also includes phpMyAdmin, which can be accessed at the post-obit URL: http://localhost/phpmyadmin
Nosotros'll utilise it to create the MySQL database we need for WordPress to run.
First, click the "New" link at the top of the left sidebar.
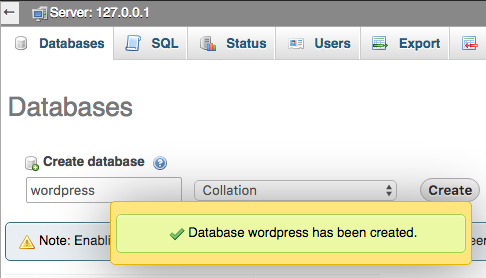
For instance purposes, we'll use wordpress. You can use whatsoever you want, just go on information technology mind for the next footstep.
Once yous've chosen your database name, blazon it in and click the "Create" button.
Now close out of phpMyAdmin, and let's head back to the WordPress installation screen at http://wordpress.localhost.
Step 7: Connect to the database
On the previously pictured language selection screen, select the linguistic communication of your choice and click the "Proceed" button.
For example purposes, nosotros'll select English (United States).
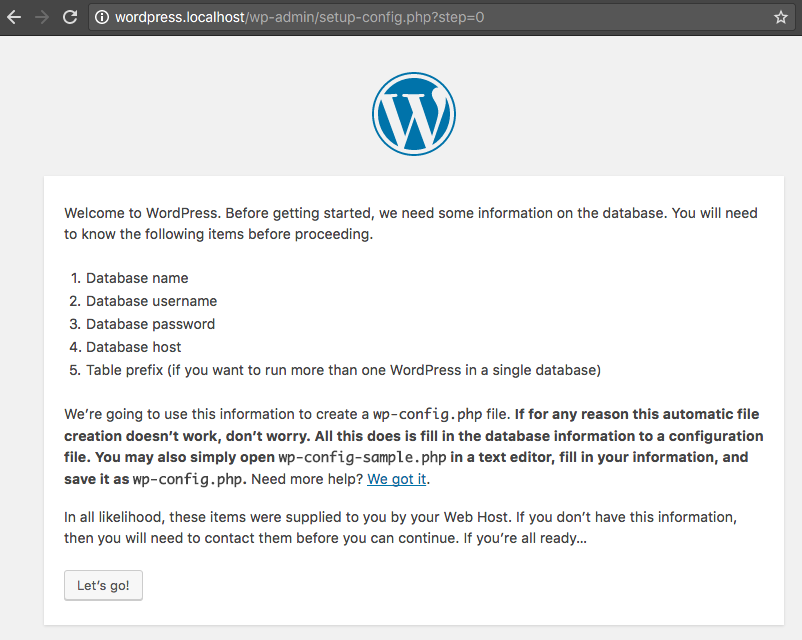
Click the "Allow'south go!" button on the next screen, as nosotros already take all the database information we need.
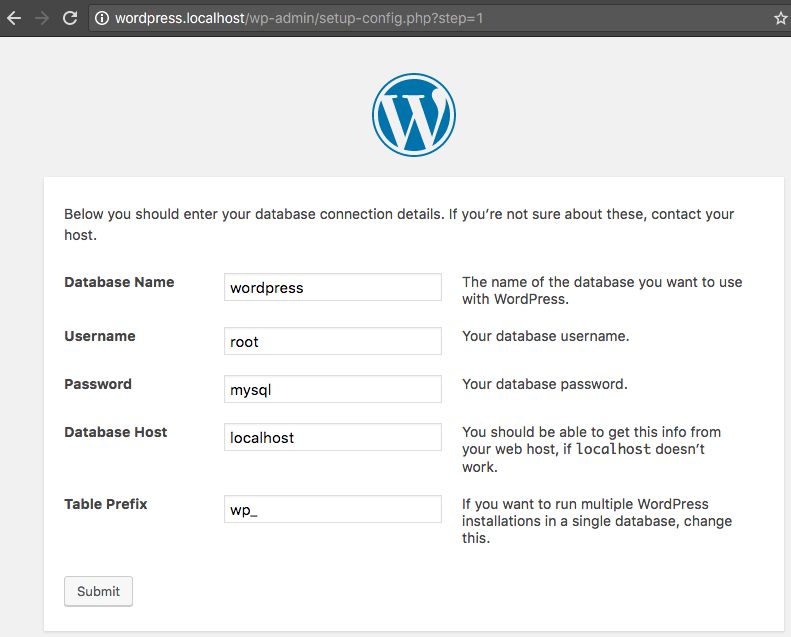
On the database credentials screen, input the post-obit information:
- Database Name: wordpress (or any you lot chose in Footstep 6)
- Username: root
- Countersign: mysql
- Database Host: localhost
- Tabular array Prefix: wp_
The root/mysql username and password combination nosotros use is a default in AMPPS, so at that place'southward no need to add together a dissever database user. The root user's password can exist changed.
We're playing things fast and loose since we're on a local environment and we want to keep things as unproblematic every bit possible for this tutorial, just information technology is not a skillful idea to use the root MySQL user on a live server, if you have the option. Many hosts don't allow information technology.
In the background, WordPress will create a wp-config.php file with the data WordPress needs to connect to the database.
Afterward successfully connecting to the database, you'll be prompted to finish the installation by specifying your WordPress site details.
Step 8: Finish installing WordPress
Fill up out your selection of site championship, username, password, and electronic mail address on the side by side screen.
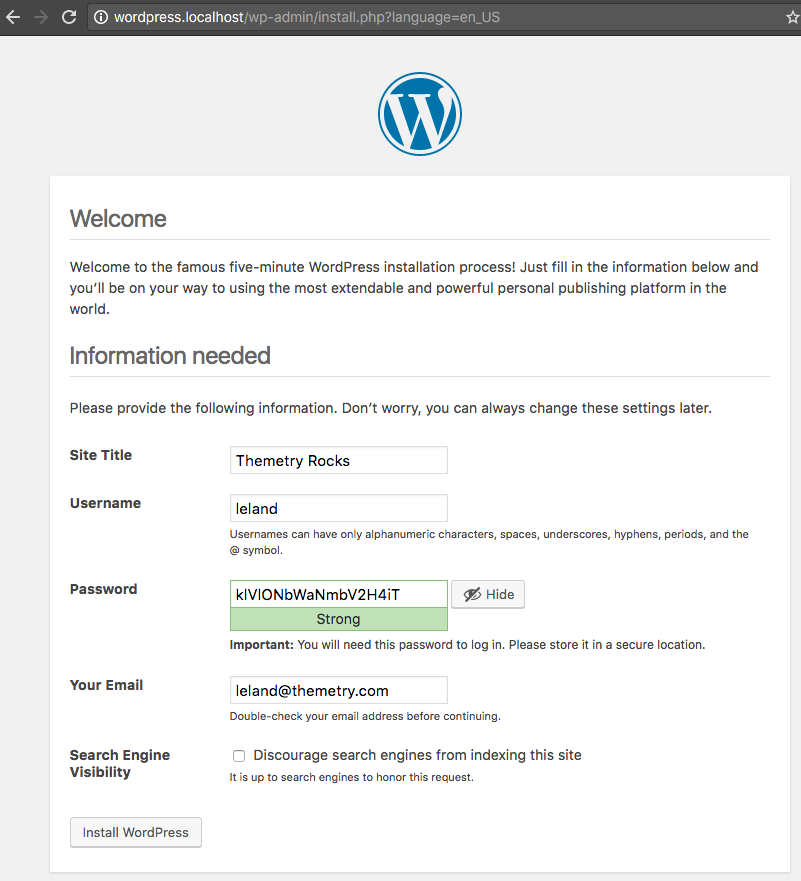
Search engine visibility doesn't matter considering this WordPress website volition non exist accessible from the web, but feel costless to further discourage search engines from indexing your site but for kicks.
Later on clicking the "Install WordPress" button, you'll be redirected to the WordPress dashboard of your newly installed local WordPress site.
Your locally-installed WordPress site is now fully functional!
In closing
Like I mentioned in the kickoff sentence in this post, there are plenty of ways to install WordPress locally.
I'm not going to argue about which fashion is the "all-time" because information technology'due south something that I'm just not that opinionated about. AMPPS works, and I'g comfortable with it. And so I utilise it.
Plus as a theme developer, I don't specially intendance most exact parity between local and live environments, since my themes will exist used on many unlike types of environments that I tin can't anticipate. It sometimes even helps me when an fault is thrown on 1 environment, but not the other, because I can look into why and eliminate it.
If you have any suggestions on what local development environment tool I should try side by side (and write a like tutorial about), I'grand all ears!
Also, would you prefer video tutorials?

Source: https://themetry.com/local-wordpress-ampps/
Posted by: osborneapocumpeat.blogspot.com
0 Response to "How To Install Ampps On Windows"
Post a Comment